Getting started
First, you need an account.
Access to the cluster is done through the SSH protocol so you will need to install an SSH client.
SSH
The OpenSSH client is already installed on Linux and Mac OS X.
You can start using the following command inside a terminal :
ssh username@cluster.ig.umons.ac.be -p 22000Since Windows 10 version 1804, an official SSH client is available through the "Manage optional features" of the Settings screen.
First Connection
Here is an example of how to register a password for your new account.
Username : demo
Password : bC346mxFZEfzr4i
Please adapt the username and password with the credentials you received.
At the first connection attempt, you will need to enter your temporary password and then choose a new password twice.
But first, you will be ask if you accept the fingerprint of the cluster. They are available at the end of this page.
$ ssh demo@cluster.ig.umons.ac.be -p 22000
The authenticity of host '[cluster.ig.umons.ac.be]:22000 ([193.190.209.220]:22000)' can\'t be established.
ECDSA key fingerprint is SHA256:zQdn3DGKBi/+dGwU+CPYnNwuHVfMXqxIi6Bnj08XSVc
Are you sure you want to continue connecting (yes/no/[fingerprint])? yes
Warning: Permanently added '[cluster.ig.umons.ac.be]:22000,[193.190.209.220]:22000' (ECDSA) to the list of known hosts.
demo@cluster.ig.umons.ac.be\' password: bC346mxFZEfzr4i

Welcome to Ubuntu 20.04.5 LTS (GNU/Linux 5.4.0-124-generic x86_64)

 * Documentation:  https://help.ubuntu.com
 * Management:     https://landscape.canonical.com
 * Support:        https://ubuntu.com/advantage

 System information disabled due to load higher than 4.0

 * Super-optimized for small spaces - read how we shrank the memory
   footprint of MicroK8s to make it the smallest full K8s around.

   https://ubuntu.com/blog/microk8s-memory-optimisation

0 updates can be applied immediately.

New release '22.04.1 LTS' available.
Run 'do-release-upgrade' to upgrade to it.

WARNING: Your password has expired.
You must change your password now and login again!
Current Password: bC346mxFZEfzr4i           (1)
New password: mY8new1Shiny5PassWord         (2)
Retype new password: mY8new1Shiny5PassWord  (2)
passwd: password updated successfully
Connection to cluster.ig.umons.ac.be closed.| 1 | Enter the same password |
| 2 | Enter a new password twice |
| It needs to be at least 15 characters long and must be made of at least one of each type : UPPERCASE/lowercase/digit. |
After entering the new password twice, you will be disconnected from the cluster. If you are using an application like puTTY, its window will go away and you will not see if there is an error or not.
|
If you cannot log in with the new password you entered, then it means the password was not accepted. Please retry from the start with the temporary password you received by mail. |
Transferring files
To upload your files on the cluster, you will need to use the SFTP protocol (SSH File Transfer Protocol) with a graphical application or the scp command which should already be installed on Linux and Mac OS X.
Here is a list of applications :
Here is an example of a transfer by terminal with scp :
[demo@laptop ~] $ scp -P22000 -r my_data_folder/ demo@cluster.ig.umons.ac.be:~/
The authenticity of host '[cluster.ig.umons.ac.be]:22000 ([193.190.209.220]:22000)' can\'t be established.
ECDSA key fingerprint is SHA256:zQdn3DGKBi/+dGwU+CPYnNwuHVfMXqxIi6Bnj08XSVc
Are you sure you want to continue connecting (yes/no/[fingerprint])? yes
Warning: Permanently added '[cluster.ig.umons.ac.be]:22000,[193.190.209.220]:22000' (ECDSA) to the list of known hosts.
demo@cluster.ig.umons.ac.be\'s password:
If the SSH key of the cluster had changed since your last connection, you will be greeted with this message :
The authenticity of host '[cluster.ig.umons.ac.be]:22000 ([193.190.209.220]:22000)' can't be established.
ECDSA key fingerprint is SHA256:zQdn3DGKBi/+dGwU+CPYnNwuHVfMXqxIi6Bnj08XSVc
Are you sure you want to continue connecting (yes/no/[fingerprint])? yes
Warning: Permanently added '[cluster.ig.umons.ac.be]:22000,[193.190.209.220]:22000' (ECDSA) to the list of known hosts.
Tunnels
What if you need to access a port on a node of the cluster from your web browser but this port is not available from outside the firewall ?
For that purpose, you can use SSH tunnels to access them from your web browser.
Let’s say you want to start a Jupyter Notebook that listen on a local port 8888 of a node and you want to view it on your local web browser.
Let’s start the process and tell it to listen on its IP address 192.168.10.72 or 0.0.0.0 :
username@laptop:~$ ssh demo@cluster.ig.umons.ac.be -p 22000

demo@datamaster:~$ srun -l deep1 -p gpu -n 2 --mem=4G --pty /bin/bash
demo@deep1:~$ jupyter-lab --ip='0.0.0.0'
...
To access this notebook, open this file in a browser:
    http://192.168.10.72:8888/?token=2844cf5d1b84ad34763d8f1b0e88f0925e4ef42fd99d9419
...
Jupyter gives you an authentication token that you will need to paste later to access the notebook.
| In this example above, I used slurm to reserve the deep1 node in interactive mode. |
Now, let’s open a tunnel in a new terminal window :
username@laptop:~$ ssh -L 8080:localhost:58888 demo@cluster

demo@datamaster:~$ ssh -L 58888:192.168.10.72:8888 demo@192.168.10.72
As long as this window is opened and the session is not closed, you will have
access to the notebook.
In your web browser, go to http://localhost:8080.
Paste the authentication token and click on Log in.
Et voilà !
When you’re done, close the tunnel properly by entering the exit command :
demo@deep1:~$ exit
logout
Connection to 192.168.10.72 closed.
demo@datamaster:~$ exit
logout
Connection to cluster.ig.umons.ac.be closed.
username@laptop:~$
And do the same with the session from which to started Jupyter.
Use Control + c on your keyboard to stop Jupyter.
^C[I 13:35:22.458 LabApp] interrupted
Serving notebooks from local directory: /home_nfs/demo
2 active kernels
The Jupyter Notebook is running at:
http://deep1:8888/?token=2844cf5d1b84ad34763d8f1b0e88f0925e4ef42fd99d9419
or http://127.0.0.1:8888/?token=2844cf5d1b84ad34763d8f1b0e88f0925e4ef42fd99d9419
Shutdown this notebook server (y/[n])? y
[C 13:37:25.532 LabApp] Shutdown confirmed
[I 13:37:25.623 LabApp] Shutting down 2 kernels
[I 13:37:26.225 LabApp] Kernel shutdown: 6f4e60c2-f865-48a1-bb03-4e31b0eab0dc
[I 13:37:26.250 LabApp] Kernel shutdown: 02abcacd-9f05-420e-8b61-8a80c282566d
demo@deep1:~$ exit
logout
Connection to deep1 closed.
demo@datamaster:~$ exit
logout
Connection to cluster.ig.umons.ac.be closed.
GUI Application (From Windows)
Here is how to do the same but in a graphical application.
First Connection
Download and install MobaXterm
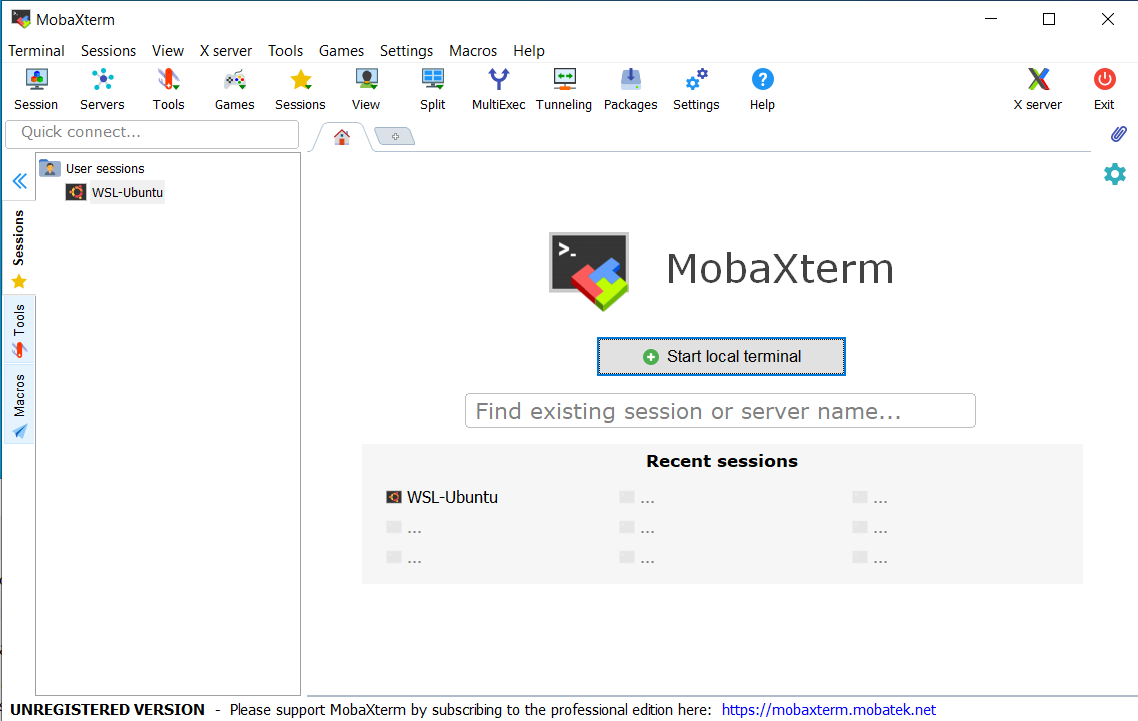
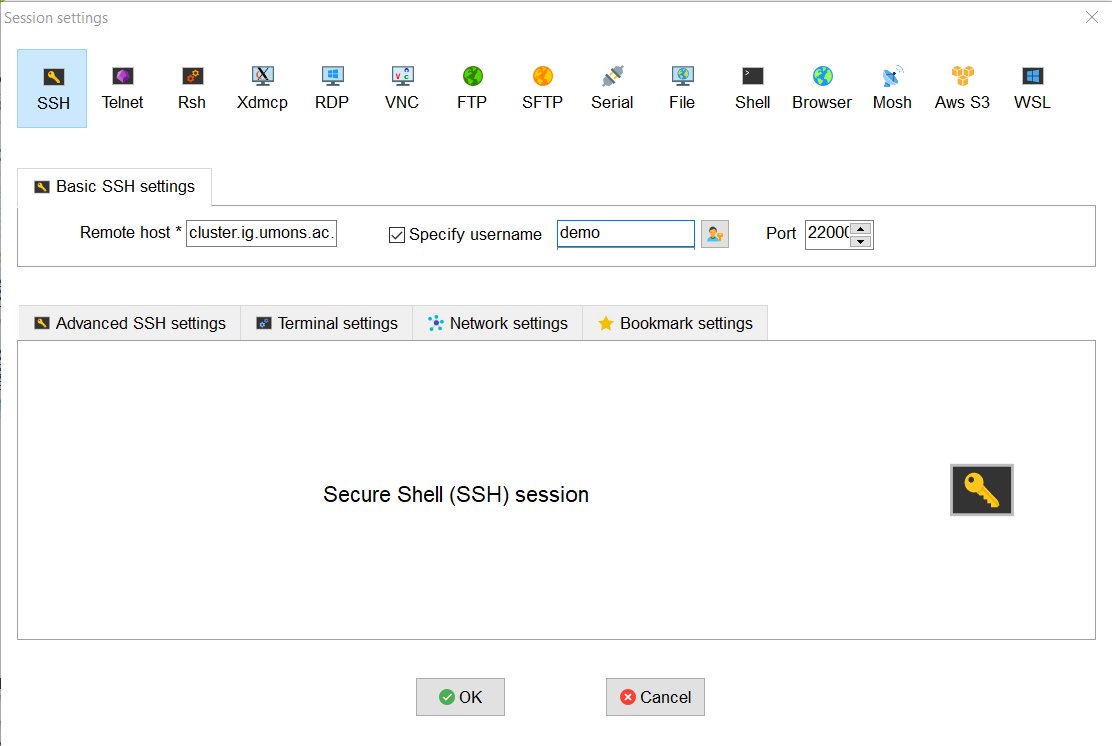
Click on the Session icon under the Terminal menu to open the following window :
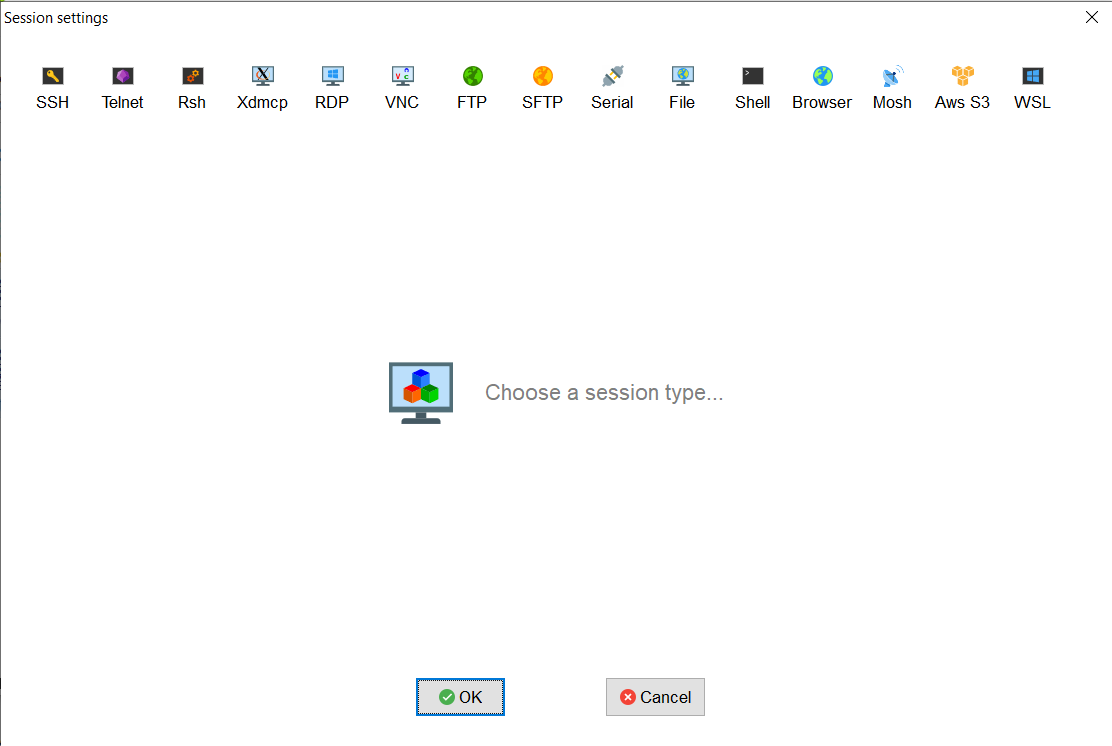
Choose the first icon SSH to open the Basic SSH Settings tab below :
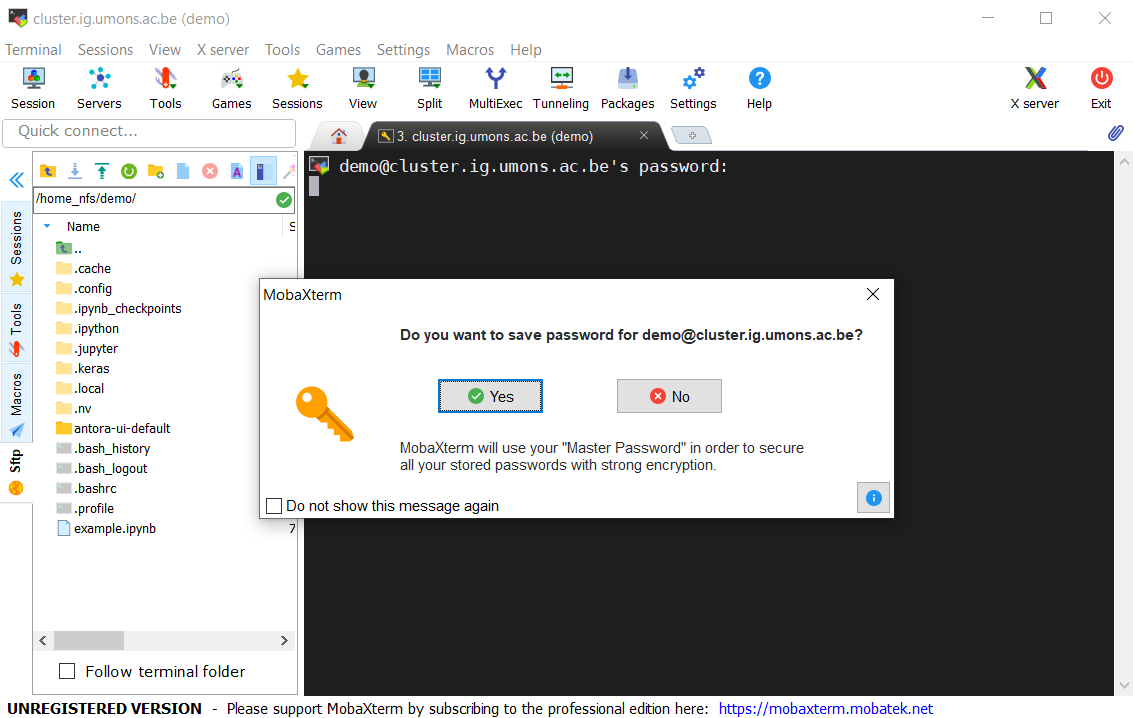
After entering your password, the app will ask you if you want to save it.
| If your own password has been set, you can save it. Otherwise, don’t do it because you are still using the temporary password. |
To prevent the session from timing out, you must enable the SSH keepalive options in the settings.
Click on the Settings icon and enable the option in the SSH tab :
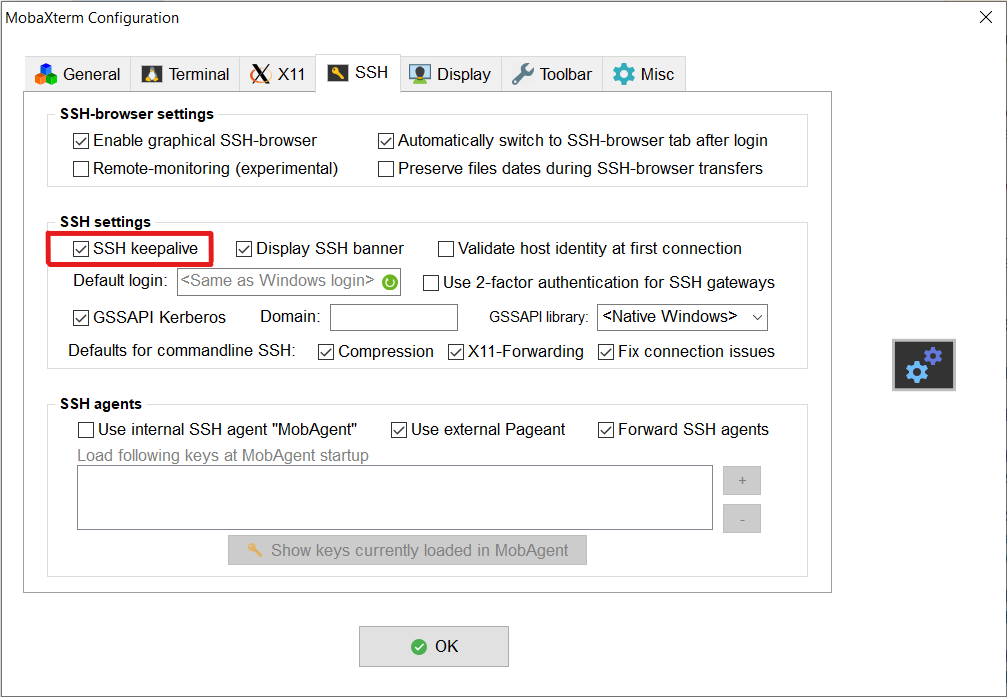
After a restart of MobaXterm, your future sessions will keep running when you don’t interact with them for more than 5 minutes.
Transferring Files
Transferring files to the cluster is easy with MobaXterm, you only need to drag and drop your files to the directory tree of the left panel (Sftp tab).
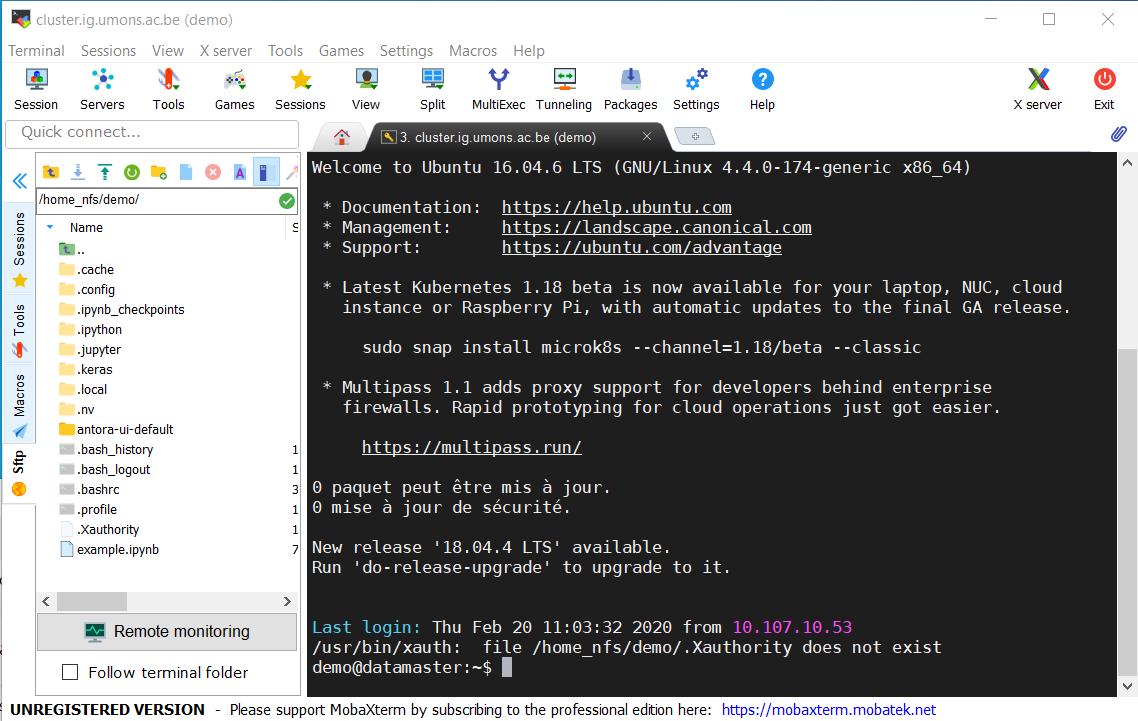
Files beginning with a dot are hidden files. You can enable or disable their display by clicking on the toolbar icons above the path.
Tunnels
What if you need to access a port on a node of the cluster from your web browser but this port is not available from outside the firewall ?
For that purpose, you can use SSH tunnels to access them from your web browser.
Let’s say you want to start a Jupyter Notebook that listen on a local port 8888 of a node and you want to view it on your local web browser.
Let’s start the process and tell it to listen on its IP address 192.168.10.72 or 0.0.0.0 :
demo@deep1:~$ jupyter notebook --ip='192.168.10.72'
...
To access this notebook, open this file in a browser:
    http://192.168.10.72:8888/?token=e9191e3d58f47dfc8620221c6b12642e5729832b8a2f34790
...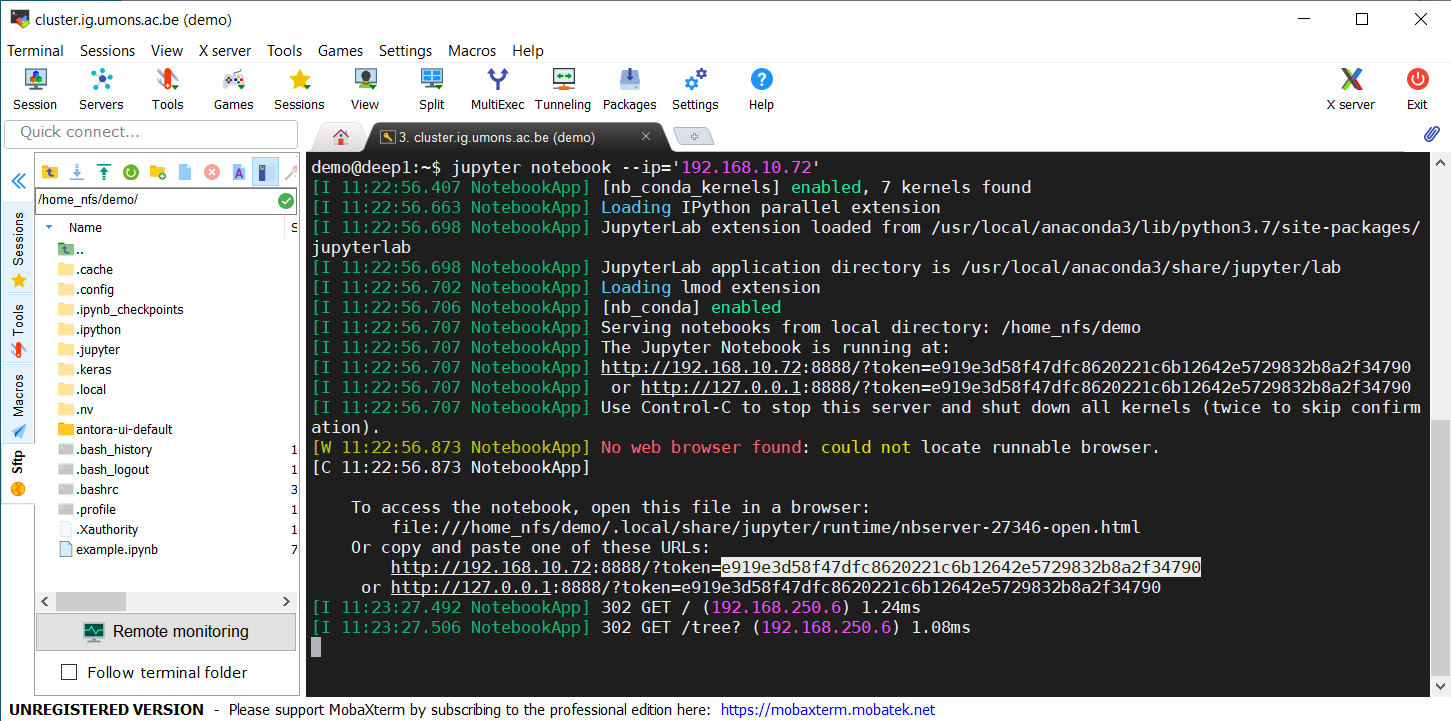
Copy the token in your clipboard, you will need it later to authenticate with Jupyter.
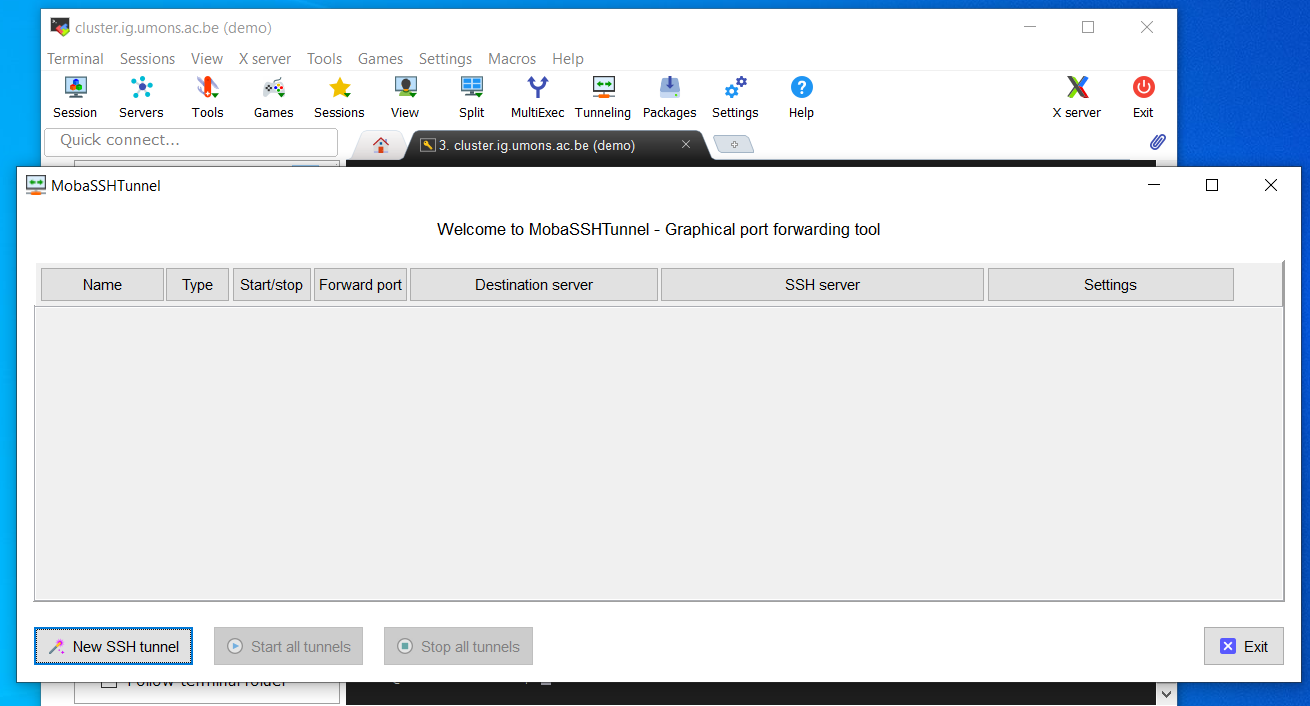
To configure a tunnel click on the Tunneling icon.

A window named MobaSSHTunnel appears and show you the tunnels you have configured :
Let’s add a new tunnel for accessing a Jupyter Notebook server that run on the node 192.168.10.72 on port 8888 :
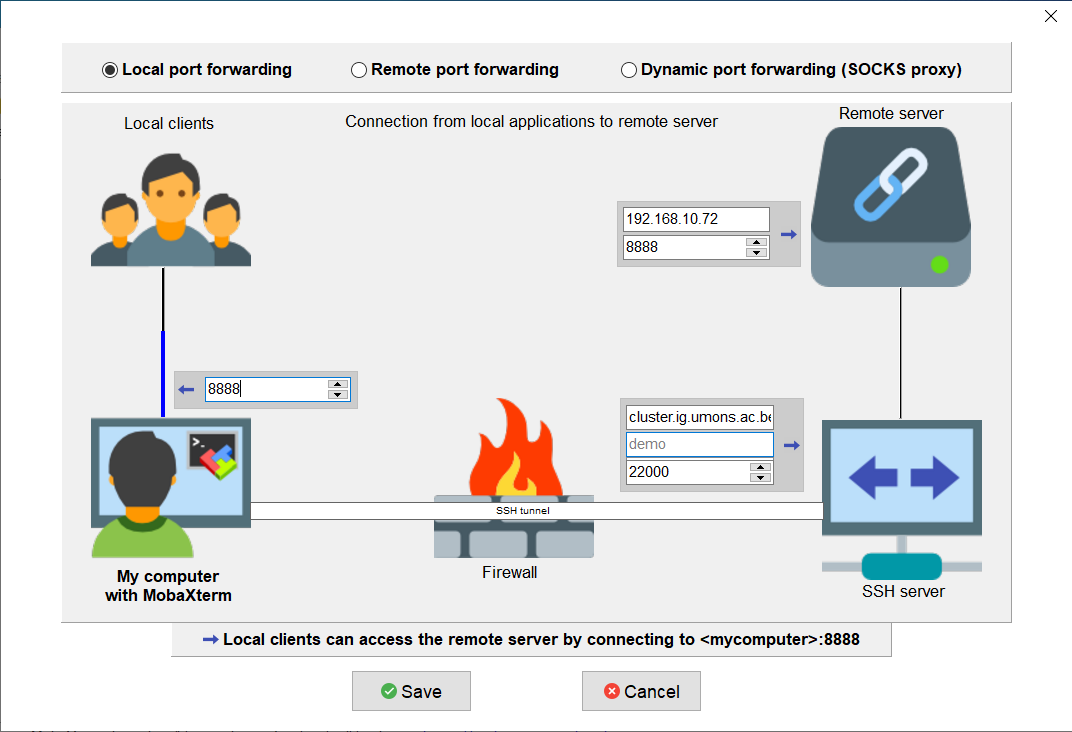
After saving, you will get back to the list of configured tunnels.
You can now click on the play button to start the tunnel :
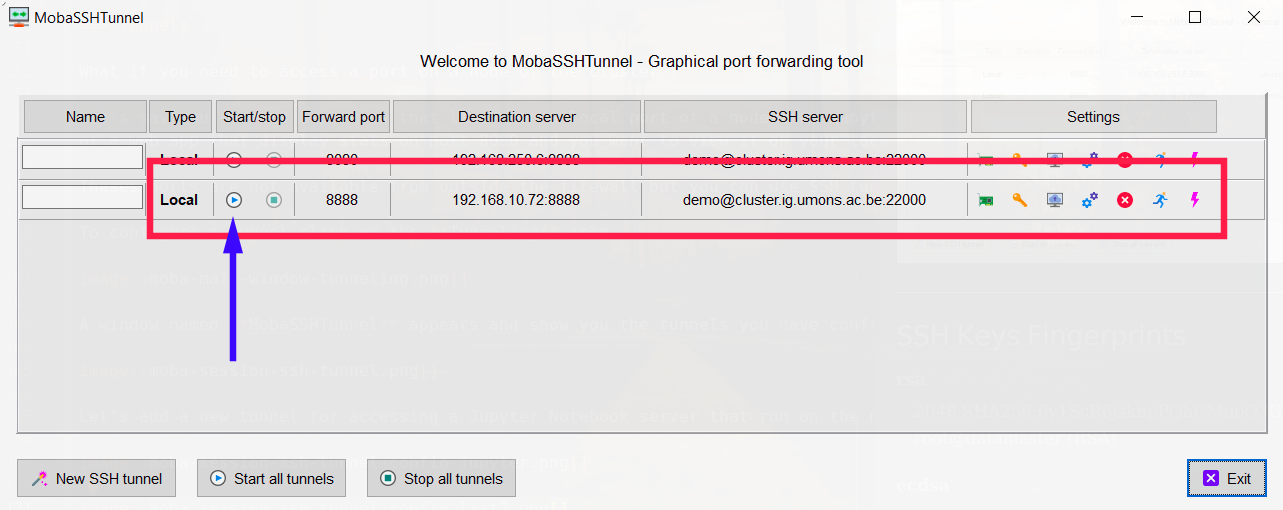
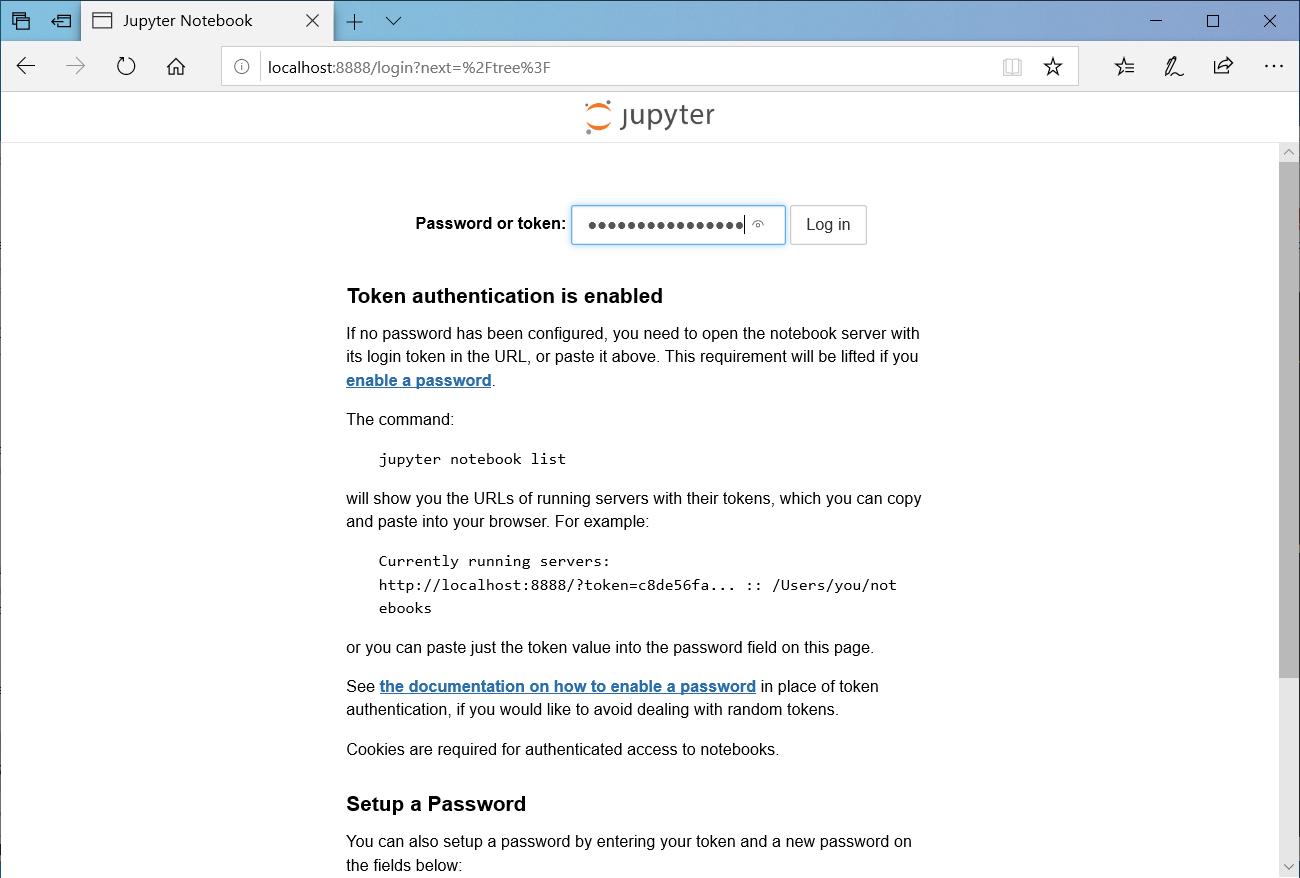
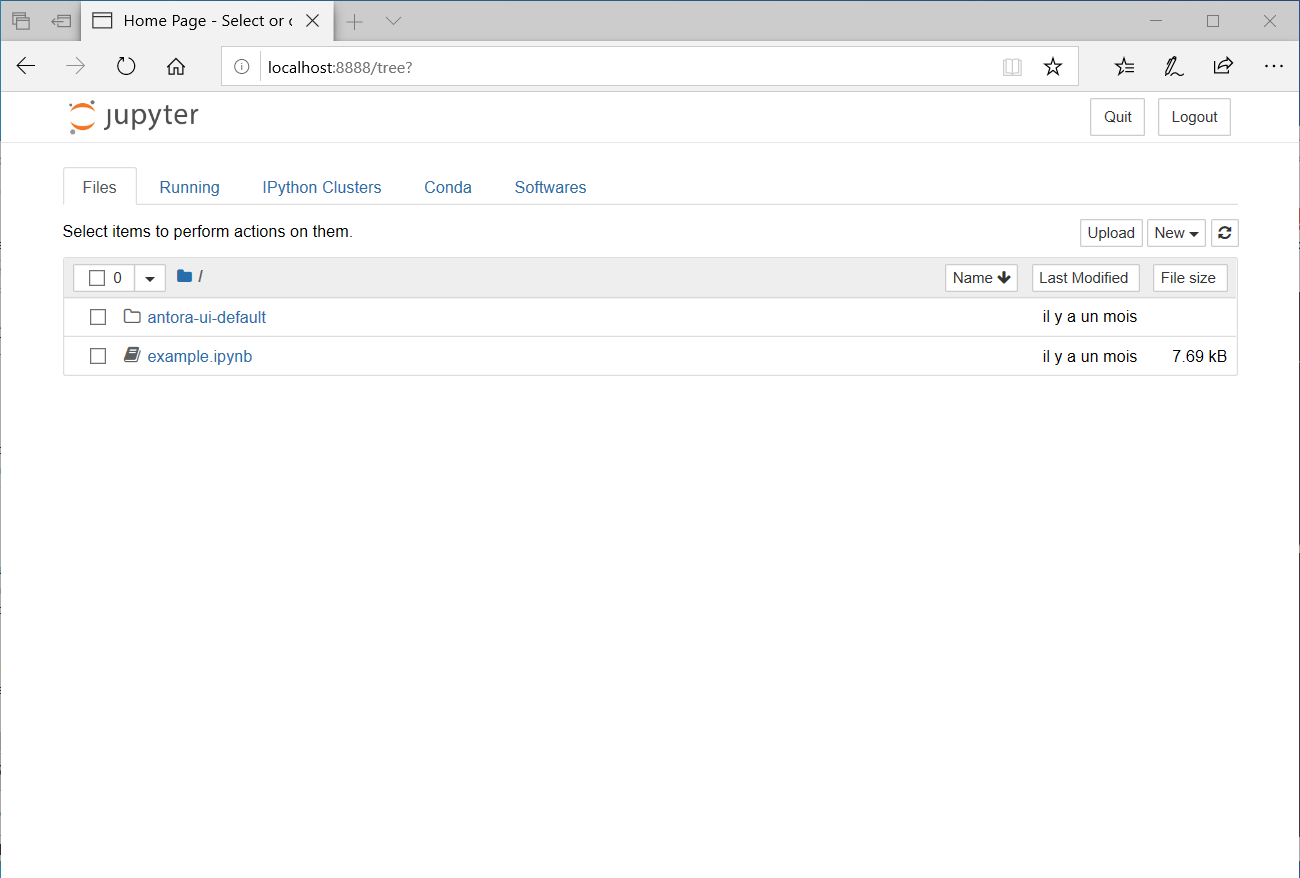
Now you can open http://localhost:8888 in your preferred browser and paste the authentication token :
Et voilà !
When you’re done, click on the stop button to close the tunnel.
Use the Control + c keyboard shortcut to stop the Jupyter process and close the sessions properly with the exit command.
^C[I 13:35:22.458 LabApp] interrupted
Serving notebooks from local directory: /home_nfs/demo
2 active kernels
The Jupyter Notebook is running at:
http://deep1:8888/?token=2844cf5d1b84ad34763d8f1b0e88f0925e4ef42fd99d9419
or http://127.0.0.1:8888/?token=2844cf5d1b84ad34763d8f1b0e88f0925e4ef42fd99d9419
Shutdown this notebook server (y/[n])? y
[C 13:37:25.532 LabApp] Shutdown confirmed
[I 13:37:25.623 LabApp] Shutting down 2 kernels
[I 13:37:26.225 LabApp] Kernel shutdown: 6f4e60c2-f865-48a1-bb03-4e31b0eab0dc
[I 13:37:26.250 LabApp] Kernel shutdown: 02abcacd-9f05-420e-8b61-8a80c282566d
demo@deep1:~$ exit
logout
Connection to deep1 closed.
demo@datamaster:~$ exit
logout
Connection to cluster.ig.umons.ac.be closed.